

It is time to share with you all my builds for Elite STFs!!
Gear and Equipment
Forward Weapons: 3xAux Dual Phaser Heavy Cannons Mk XII [Acc]x2 [Dmg] (included in the Vesta purchase)
Aft Weapons: Kinetic Cutting Beam Mk XII (from Omega Reputation - Tier II)
Phaser Beam Array Mk XI [Acc]x2 or better (a phaser turret with the same modifier is good too)
Tricobalt Mine Launcher Mk XII [CritD]x2 or better (the modifier [Dmg]x2 are fine too)
Deflector: Assimilated Deflector Array Mk XII or Adapted M.A.C.O. Positron Deflector Array Mk XII (from Omega Reputation - Tier V)
Engine: Assimilated Subtranswarp Engines Mk XII or Adapted M.A.C.O. Combat Impulse Engines (from Omega Reputation - Tier V)
Shields: Assimilated Regenerative Shield Array Mk XII or Adapted M.A.C.O. Covariant Shield Array (from Omega Reputation - Tier V)
Hangar gear: Advanced Peregrine Fighters for Infected and Cure; Advanced Danube Runabouts for Khitomer if you are guarding probes
 Tips & Tricks: Use the assimilated space set to gain the really interesting passive abilities that can save your live very often, or use the Adapted M.A.C.O. set (which is the Fed equivalent to KDF Honor Guard Space Set)if you want to widely employ tricobalt mines, thanks to the "Tactical Readiness" power which gives you a 25% increase in projectile damage
Bridge Officer Layout
Tactical station - Lieutenant: Tactical Team I; Cannon: Scatter Volley I
Universal station - Lieutenant-Commander (Tactical): Tactical Team I; Cannon: Scatter Volley I; Dispersal Pattern Beta II
Universal staion - Ensign (Science): Transfer Shield Strenght I
Engineering station - Lieutenant: Emergency Power to Shields I; Auxiliary to Structural I
Science station - Commander: Hazard Emitters I; Transfer Shield Strenght II; Hazard Emitters III; Gravity Well III (if possible replace Hazard Emitters I; Hazard Emitters II; Transfer Shield Strenght III)
Tips & Tricks: To maximize tanking capabilities, use Human Bridge Officers, which grant a bonus to your starship hull repair rate!
Console Layout
Tactical Consoles: 3x Phaser Relay Mk XI (or better)
TCD Subspace Infuser Mk XI (or better)
Engineering Consoles: Monotanium Alloy Mk XI (or better)
Ablative Hull Plating Mk XI (or better)
Science Consoles: 2x Field Generator Mk XI (or better - available in the dilithium store)
Quantum Field Focus Controller (included in the tactical Vesta)
Assimilated Module (from Omega Reputation - Tier I)
Tips & Tricks: If you are able to, replace the Assimilated Module and one of the two engineering consoles for the other two Vesta Consoles (Fermions; Multidimensional Wave) available with the other two models. Also, having all the three ships will grant you the Vesta skin, which is imho the best one!
Personal Skill Tree: http://www.stoacademy.com/tools/skillplanner/index.php?build=vestastf_2767
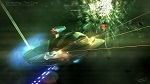
FEATURING: Aventine class starship - Tactical Vesta
Gear and Equipment
Forward Weapons: 3xAux Dual Phaser Heavy Cannons Mk XII [Acc]x2 [Dmg] (included in the Vesta purchase)
Aft Weapons: Kinetic Cutting Beam Mk XII (from Omega Reputation - Tier II)
Phaser Beam Array Mk XI [Acc]x2 or better (a phaser turret with the same modifier is good too)
Tricobalt Mine Launcher Mk XII [CritD]x2 or better (the modifier [Dmg]x2 are fine too)
Deflector: Assimilated Deflector Array Mk XII or Adapted M.A.C.O. Positron Deflector Array Mk XII (from Omega Reputation - Tier V)
Engine: Assimilated Subtranswarp Engines Mk XII or Adapted M.A.C.O. Combat Impulse Engines (from Omega Reputation - Tier V)
Shields: Assimilated Regenerative Shield Array Mk XII or Adapted M.A.C.O. Covariant Shield Array (from Omega Reputation - Tier V)
Hangar gear: Advanced Peregrine Fighters for Infected and Cure; Advanced Danube Runabouts for Khitomer if you are guarding probes
Bridge Officer Layout
Tactical station - Lieutenant: Tactical Team I; Cannon: Scatter Volley I
Universal station - Lieutenant-Commander (Tactical): Tactical Team I; Cannon: Scatter Volley I; Dispersal Pattern Beta II
Universal staion - Ensign (Science): Transfer Shield Strenght I
Engineering station - Lieutenant: Emergency Power to Shields I; Auxiliary to Structural I
Science station - Commander: Hazard Emitters I; Transfer Shield Strenght II; Hazard Emitters III; Gravity Well III (if possible replace Hazard Emitters I; Hazard Emitters II; Transfer Shield Strenght III)
Console Layout
Tactical Consoles: 3x Phaser Relay Mk XI (or better)
TCD Subspace Infuser Mk XI (or better)
Engineering Consoles: Monotanium Alloy Mk XI (or better)
Ablative Hull Plating Mk XI (or better)
Science Consoles: 2x Field Generator Mk XI (or better - available in the dilithium store)
Quantum Field Focus Controller (included in the tactical Vesta)
Assimilated Module (from Omega Reputation - Tier I)
Personal Skill Tree: http://www.stoacademy.com/tools/skillplanner/index.php?build=vestastf_2767
